Best Practices for Waking Up Your Indoor Plants
The birds are singing their spring songs, it is light
outside when we get up or drive home from work, snow is
melting…Spring is on the horizon! If your indoor plants haven’t already started
putting out new growth, they will very soon. Those plants in your windows are
especially feeling those longer daylight hours. And the relative humidity
inside should be rising to less arid levels with the heat not running as much.
Just as bears, chipmunks and skunks are emerging from hibernation, our plants are coming out of their dormant period.
On soft small stems or trailers, you can use your kitchen
scissors or shears, but don’t break those scissors trying to cut branches that
are too hard or big. And whatever you do, do not snap them off by hand, leaving
ragged ends! Lightweight pruners can be
inexpensive at your local hardware store or garden center.
On many plants, the new growth will emerge right behind your cut so think about where you want those lovely little sprouts to be. Try to not just nip the tips of the plant’s branches or stems. Cut it back towards the center where it can fill in and the bare stem is hidden by taller growth. Hesitant? The reasons behind why may make it easier for you. Plants generate growth hormone which concentrates at the growing tip. When you prune, the hormone is released along the length of the stem and creates new sprouts.
It is always worth a try to root the cuttings – either in water or directly into soil. Rooting powder is nice to help avoid root rot but not totally necessary. Just remove the lower leaves off the cut stem and stick right back into the pot if there is enough potting mix for it to take root. Water the cutting, and then leave alone until the “soil” is dry on top. Or you can put the cutting into water and once they have put out roots that are 2-3 inches long, pot them up. (worth another discussion later about propagation). What have you got to lose? You already should have new sprouts on the pruned rejuvenated plant. If any cuttings take root, you are ahead of the game!
Ok, NOW can you fertilize? Not quite yet. Check to make sure the plant is not too
rootbound or has exposed roots at the top or bottom of the grow pot. Can you
see roots at the top of your grow pot? Are there roots growing out the drain
holes at the bottom? It does not necessarily mean you have to get a bigger pot.
Often you can just add fresh sterile potting mix. Pop
your plant out of the pot, trim the roots and add a bit of potting mix to the
bottom. Or add some to the top if roots are showing there.
While you are checking out the root system, note whether there is any white crustiness at the top or bottom of the grow pot. Those are salts either from your water or your fertilizer and accumulations of those salts can burn the roots and cause spots or yellowed edges on the leaves. Just wipe OFF the white crust and know that the fresh potting mix will help bring the salt levels back down to a healthy ratio for your plant.
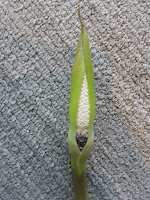
Plants grown primarily for their greenery can put out insignificant flowers which will divert nutrition away from the plant's leaf production. These flowers can be odd looking and can be sticky with sap. If you see flowers trying to emerge, it is best for the overall health of the plant to cut them off. The flowering cycle drains energy from the plant that it would otherwise put into making new leaves.
OK, NOW you can think about fertilizing! NEXT month! See you then!


